Documenting an ASP.NET Core API with OpenAPI / Swagger In Detail

Published On Sunday June 21, 2020
Reading Time: 5 minutes
Documenting an API is an essential task. When consuming a Web API, understanding its various methods can be challenging for a developer. Swagger, also known as OpenAPI, helps to generate useful documentation for Web APIs. It provides benefits such as interactive documentation, client SDK generation, and API discoverability. Swagger helps in Simplifying API development for users, teams, and enterprises with the Swagger open source and professional toolset.
Here I am using a .Net Core 3.1 Web API Template Application for the demonstration.
You can view the complete code from my Github Repo on the Link.
Please install the package dependencies:
Configurations:
We need to swagger configuration inside a method ConfigureServices on the file Startup.cs for starting
            services.AddSwaggerGen(c =>
            {
                c.SwaggerDoc("V1", new OpenApiInfo
                {
                    Title = "Swagger Implementation",
                    Version = "V1",
                    Description = "Api Description",
                    TermsOfService = new Uri("https://rashik.com.np"),
                    Contact = new OpenApiContact
                    {
                        Name = "Company Name",
                        Email = "info@email.com",
                        Url = new Uri("https://rashik.com.np"),
                    },
                    License = new OpenApiLicense
                    {
                        Name = "Swagger Implementation License",
                        Url = new Uri("https://rashik.com.np"),
                    }
                });

            });
Then we need to add similar configuration inside the method Configure
            // Enable middleware to serve generated Swagger as a JSON endpoint.
            app.UseSwagger();

            // Enable middleware to serve swagger-ui (HTML, JS, CSS, etc.),
            // specifying the Swagger JSON endpoint.
            app.UseSwaggerUI(c =>
            {
                c.SwaggerEndpoint("/swagger/V1/swagger.json", "Integrating Swagger");
            });
Now the whole Startup.cs file will look like
public class Startup
{
    public Startup(IConfiguration configuration)
    {
        Configuration = configuration;
    }

    public IConfiguration Configuration { get; }

    // This method gets called by the runtime. Use this method to add services to the container.
    public void ConfigureServices(IServiceCollection services)
    {
        services.AddControllers();
        services.AddSwaggerGen(c =>
        {
            c.SwaggerDoc("V1", new OpenApiInfo
            {
                Title = "Swagger Implementation",
                Version = "V1",
                Description = "Api Description",
                TermsOfService = new Uri("https://rashik.com.np"),
                Contact = new OpenApiContact
                {
                    Name = "Company Name",
                    Email = "info@email.com",
                    Url = new Uri("https://rashik.com.np"),
                },
                License = new OpenApiLicense
                {
                    Name = "Swagger Implementation License",
                    Url = new Uri("https://rashik.com.np"),
                }
            });

        });
    }

    // This method gets called by the runtime. Use this method to configure the HTTP request pipeline.
    public void Configure(IApplicationBuilder app, IWebHostEnvironment env)
    {
        if (env.IsDevelopment())
        {
            app.UseDeveloperExceptionPage();
        }

        // Enable middleware to serve generated Swagger as a JSON endpoint.
        app.UseSwagger();

        // Enable middleware to serve swagger-ui (HTML, JS, CSS, etc.),
        // specifying the Swagger JSON endpoint.
        app.UseSwaggerUI(c =>
        {
            c.SwaggerEndpoint("/swagger/V1/swagger.json", "Integrating Swagger");
        });

        app.UseHttpsRedirection();

        app.UseRouting();

        app.UseAuthorization();

        app.UseEndpoints(endpoints =>
        {
            endpoints.MapControllers();
        });
    }
}
The initial configuration part is now all complete and you can simply start the application and browser the URL with suffix as /swagger e.g. https://localhost:44311/swagger
Swagger UI Screen:

If you want the swagger UI to appear on the root URL itself without the suffix /swagger we can simply achieve it by adding a line of code on the Configure method:
app.UseSwaggerUI(c =>
{
    c.SwaggerEndpoint("/swagger/V1/swagger.json", "Integrating Swagger");
    c.RoutePrefix = string.Empty;  //Code to be added
});
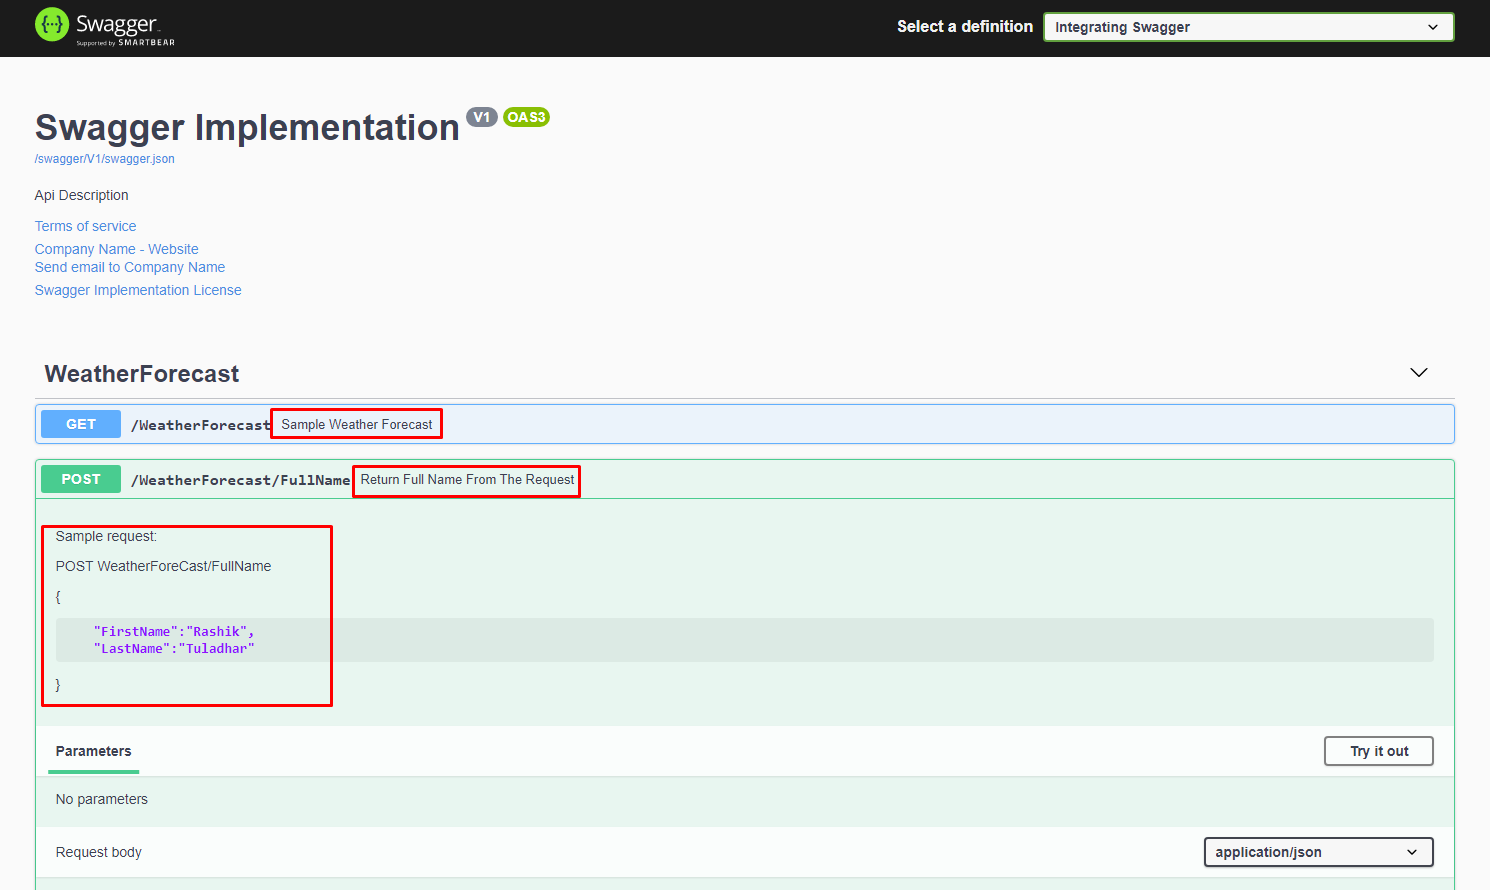
Now what values does the configuration meant and where it is depicted in the UI can be presented in the image below:

We can further add more details to the documentation with Swagger using the method XML comments in the API methods. We can add a more detailed description of the methods together with the test data sample in the documentation.
on the method invocation c.SwaggerDoc method call inside the ConfigureServices we need to add some configuration code so the method looks like
public void ConfigureServices(IServiceCollection services)
        {
            services.AddControllers();
            services.AddSwaggerGen(c =>
            {
                c.SwaggerDoc("V1", new OpenApiInfo
                {
                    Title = "Swagger Implementation",
                    Version = "V1",
                    Description = "Api Description",
                    TermsOfService = new Uri("https://rashik.com.np"),
                    Contact = new OpenApiContact
                    {
                        Name = "Company Name",
                        Email = "info@email.com",
                        Url = new Uri("https://rashik.com.np"),
                    },
                    License = new OpenApiLicense
                    {
                        Name = "Swagger Implementation License",
                        Url = new Uri("https://rashik.com.np"),
                    }
                });
                // Set the comments path for the Swagger JSON and UI.
                var xmlFile = $"{Assembly.GetExecutingAssembly().GetName().Name}.xml";
                var xmlPath = Path.Combine(AppContext.BaseDirectory, xmlFile);
                c.IncludeXmlComments(xmlPath);
            });
        }
Now adding the code if we start the application we might receive an error as

For the solution, we need to enable the XML documentation file from the project properties for this go to project properties and enable the XML documentation file as in the screenshot

Once configured the project will run smoothly as before. The setting will enable the summary content made right above the method declaration to be displayed in the documentation as well. For a simple example, we will make a slight change on the WeatherForecastController by adding a method and comments so the controller will look like
[ApiController]
    [Route("[controller]")]
    public class WeatherForecastController : ControllerBase
    {
        private static readonly string[] Summaries = new[]
        {
            "Freezing", "Bracing", "Chilly", "Cool", "Mild", "Warm", "Balmy", "Hot", "Sweltering", "Scorching"
        };

        private readonly ILogger<WeatherForecastController> _logger;

        public WeatherForecastController(ILogger<WeatherForecastController> logger)
        {
            _logger = logger;
        }

        /// <summary>
        /// Sample Weather Forecast
        /// </summary>
        /// <returns></returns>
        [HttpGet]
        public IEnumerable<WeatherForecast> Get()
        {
            var rng = new Random();
            return Enumerable.Range(1, 5).Select(index => new WeatherForecast
            {
                Date = DateTime.Now.AddDays(index),
                TemperatureC = rng.Next(-20, 55),
                Summary = Summaries[rng.Next(Summaries.Length)]
            })
            .ToArray();
        }


        /// <summary>
        /// Return Full Name From The Request
        /// </summary>
        /// <remarks>
        /// Sample request:
        ///
        /// POST WeatherForeCast/FullName
        ///
        /// {
        ///
        ///         "FirstName":"Rashik",
        ///         "LastName":"Tuladhar"
        ///
        /// }
        /// </remarks>
        /// <param name="person"></param>
        /// <returns></returns>
        [Route("FullName")]
        [HttpPost]
        public string FullName(Person person)
        {
            return person.FirstName + " " + person.LastName;
        }
    }
For the method FullName, I have added a class with the name Person as
public class Person
    {
        [Required]
        public string FirstName { get; set; }
        [Required]
        public string LastName { get; set; }
    }
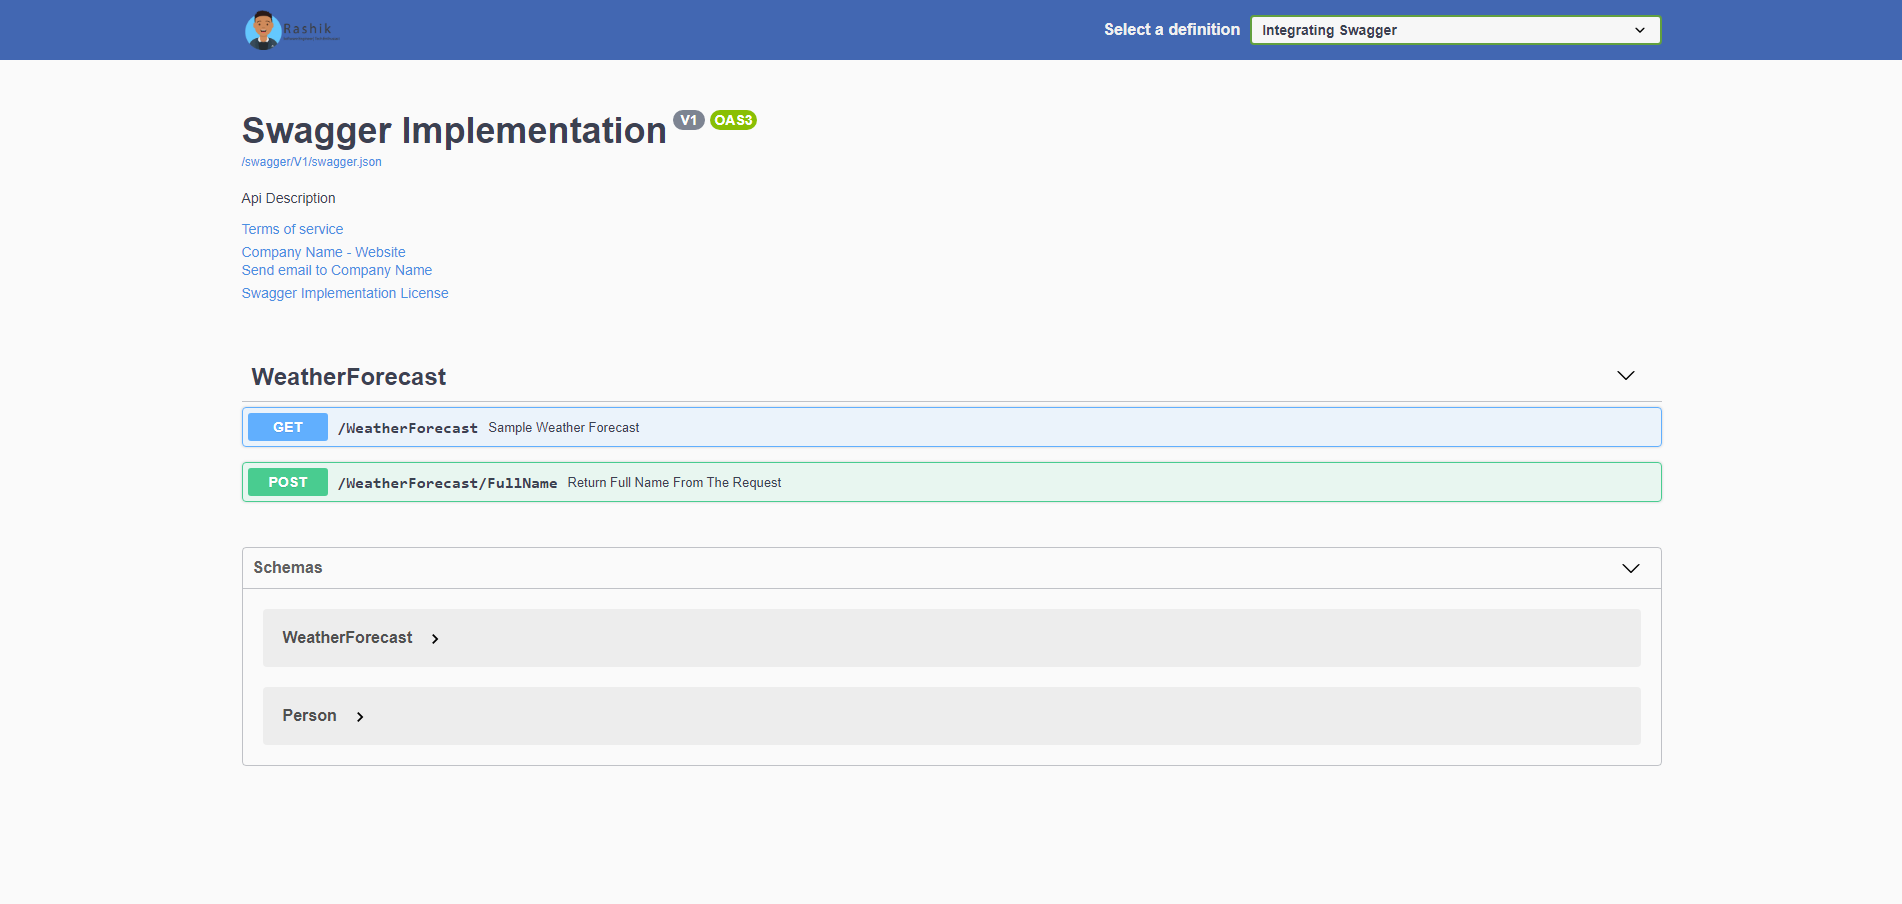
Now the Swagger UI page looks like
This is how we can document our API using OpenApi/Swagger in detail. You can find the source code used in the tutorial from the Link.
For instance what if you want to change the UI of the Swagger Ui to your theme color and logo like the one below
I have a separate post for the customization on the topic Customize Swagger UI With Custom Logo And Theme Color.
Did you find this blog post helpful? If so, whom could you share it with?